On this information, we’ll stroll you thru including a vibration motor module to your current ESP32 Lora Meshtastic Node. This information will work additionally for every other ESP32-based board like Heltec V3 Lora, TTGo, or T-Beam however slight adjustments is perhaps required.
Meshtastic DIY – How To Build Your Own Meshtastic Node ESP32 & Lora Radio
“Create your own Meshtastic LoRa Node with our easy DIY guide. A complete step-by-step for building your customized mesh communication system.
{Hardware}
Now let’s get began with the {hardware} you want:
🛑
The merchandise is priced at $0.79 however the transport price is 3.68$. Please bear in mind that in the event you request a refund, the transport price is non-refundable. It is a widespread tactic utilized by AliExpress sellers to keep away from issuing refunds.
📢
When ordering from AliExpress, contemplate consolidating your purchases from a single vendor to maximise financial savings. For example, in the event you’re buying an antenna from vendor X, examine if additionally they provide an IPEX to SMA-Ok cable. By sourcing all of your objects from one vendor, you may considerably cut back transport prices.
Meeting
The {hardware} is all prepared and set now to the wiring. For this, we are going to observe the next Schematics.
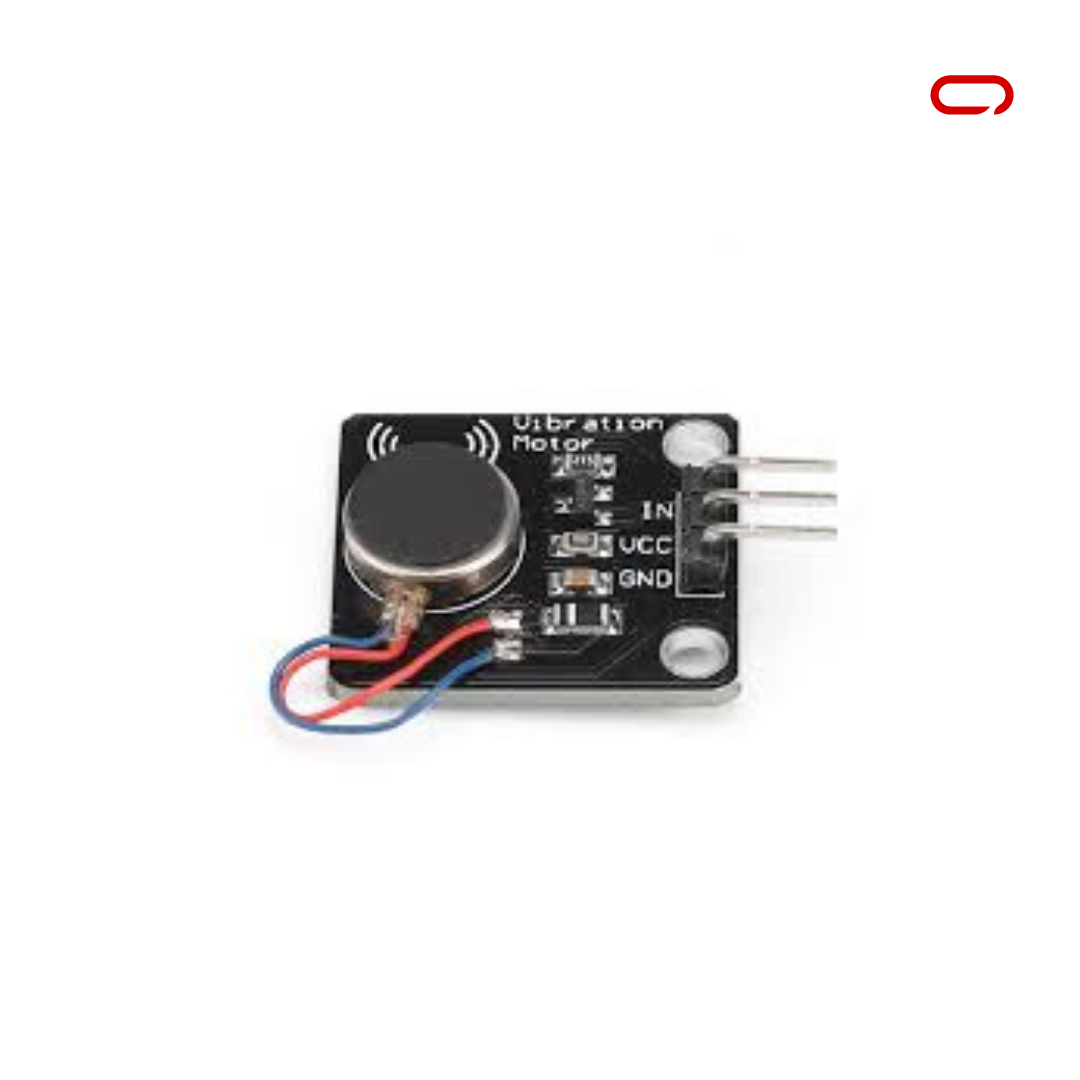
Vibration Motor Module 3.3V- DIY ESP32 Meshtastic Node
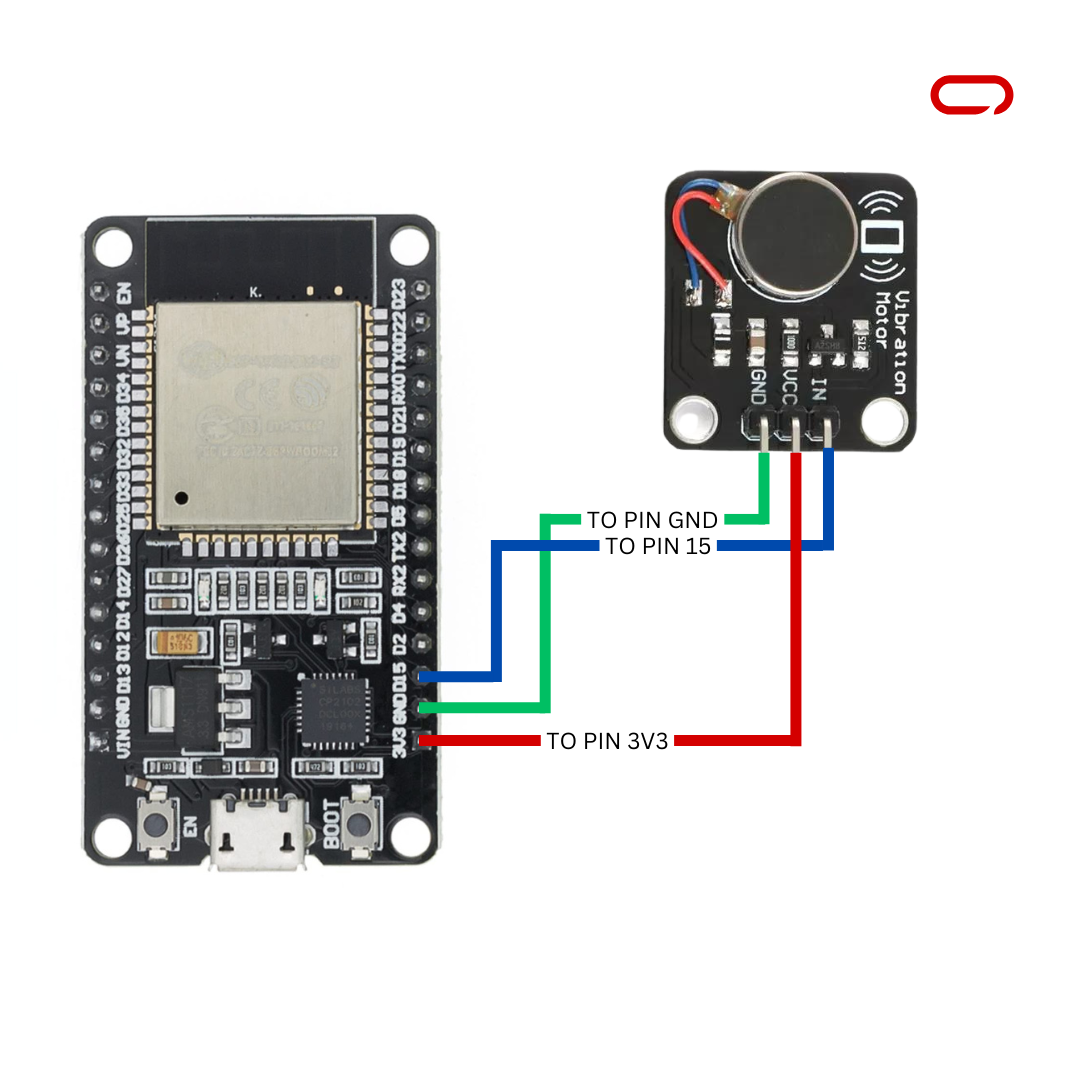
Vibration Motor Module 5V- DIY ESP32 Meshtastic Node
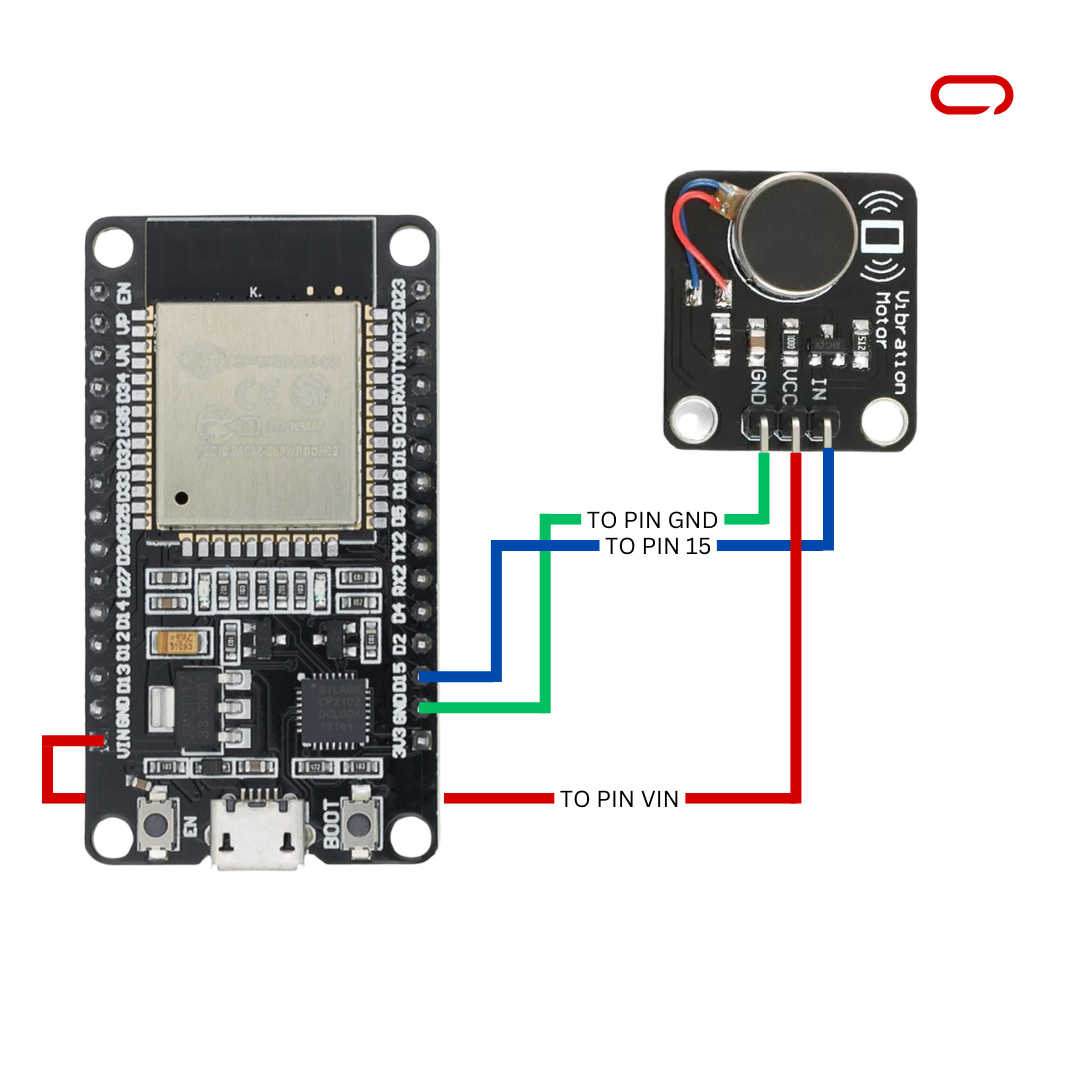
- IN-> GPIO 15
- GND-> GND
- VCC/VIN -> 3V3 / 5V
💡
Should you’re utilizing a unique ESP32-based board like Heltec V3 Lora, TTGo, or T-Beam, merely choose an obtainable GPIO pin that accepts digital alerts, helps pull-up or pull-down resistors, and is not already in use. Then, observe the information utilizing the chosen pin, disregarding the particular pin quantity talked about within the directions
💡
The Vibration Motor Module May Not Work On 5V With a Battery, It Works Solely With USB
💡
Capacitors are good observe for decoupling one a part of a circuit from one other
💡
It is Necessary To Be aware That The Order Of The Connections May Fluctuate. Observe The Labels And Io Ports On Your Particular Parts And The Supplied Schematics To Guarantee Correct Wiring. Paying Consideration To These Particulars Ensures That You Set up The Right Connections And Keep away from Potential Points or Damaging Your Parts
As soon as all of the wiring is accomplished. Double-check your connections and guarantee they match the recommended structure earlier than continuing to the following steps.
Meshtastic Settings
- Open Meshtastic App (IOS for this information)
- Go to the Settings web page
- Within the module configuration part go to Exterior Notification
- Toggle the swap to allow Allow, Alert when receiving a message, Use PWM Buzzer (Optionally available Observe Be aware)
- Scroll down then Main GPIO toggle Energetic then set the Output Pin GPIO to Pin 15
- Save, the node then will restart
💡
Optionally available: If you would like your gadget to vibrate in a particular sample, go to the Settings web page and choose Ringtone. From there, paste the RTTTL code to set your required ringtone and customise the vibration sample to your liking.
Right here is an instance
Halloween:d=4,o=5,b=180:8d6,8g,8g,8d6,8g,8g,8d6,8g,8d#6,8g,
8d6,8g,8g,8d6,8g,8g,8d6,8g,8d#6,8g,8c#6,8f#,8f#,8c#6,8f#,8f#,
8c#6,8f#,8d6,8f#,8c#6,8f#,8f#,8c#6,8f#,8f#,8c#6,8f#,8d6,8f#
In conclusion, including a brand new notification module to your DIY ESP32 Meshtastic Node with a vibration motor module is an easy course of. By fastidiously following the supplied information, which features a listing of required {hardware} and step-by-step directions, you may seamlessly combine a vibration motor module into your current setup.


