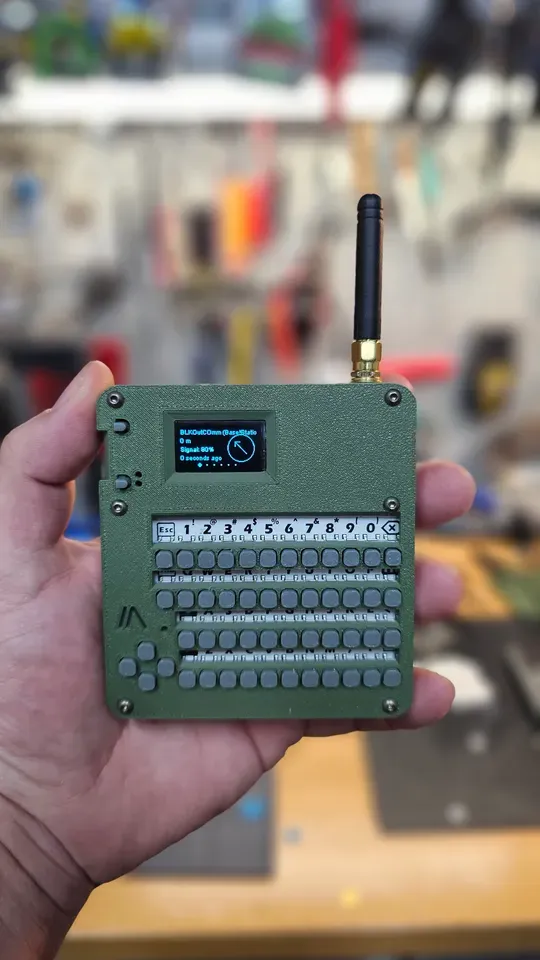
On this information, we will present you find out how to add M5Stack CardKB Keyboard into your present ESP32 Lora Meshtastic Node setup. This course of may be tailored for different ESP32-based units with just a few tweaks. By including a keyboard to your node, you will remodel it into a totally unbiased unit. Now, you can ship messages and even management some capabilities (although help could also be restricted) immediately from the node itself, with out counting on a telephone. Let’s get began!
Meshtastic DIY – How To Build Your Own Meshtastic Node ESP32 & Lora Radio
“Create your own Meshtastic LoRa Node with our easy DIY guide. A complete step-by-step for building your customized mesh communication system.

{Hardware}
Now let’s get began with the {hardware} you want:
📢
When ordering from AliExpress, think about consolidating your purchases from a single vendor to maximise financial savings. As an illustration, when you’re buying an antenna from vendor X, verify if additionally they supply an IPEX to SMA-Ok cable. By sourcing all of your objects from one vendor, you’ll be able to considerably cut back transport prices.
Meeting
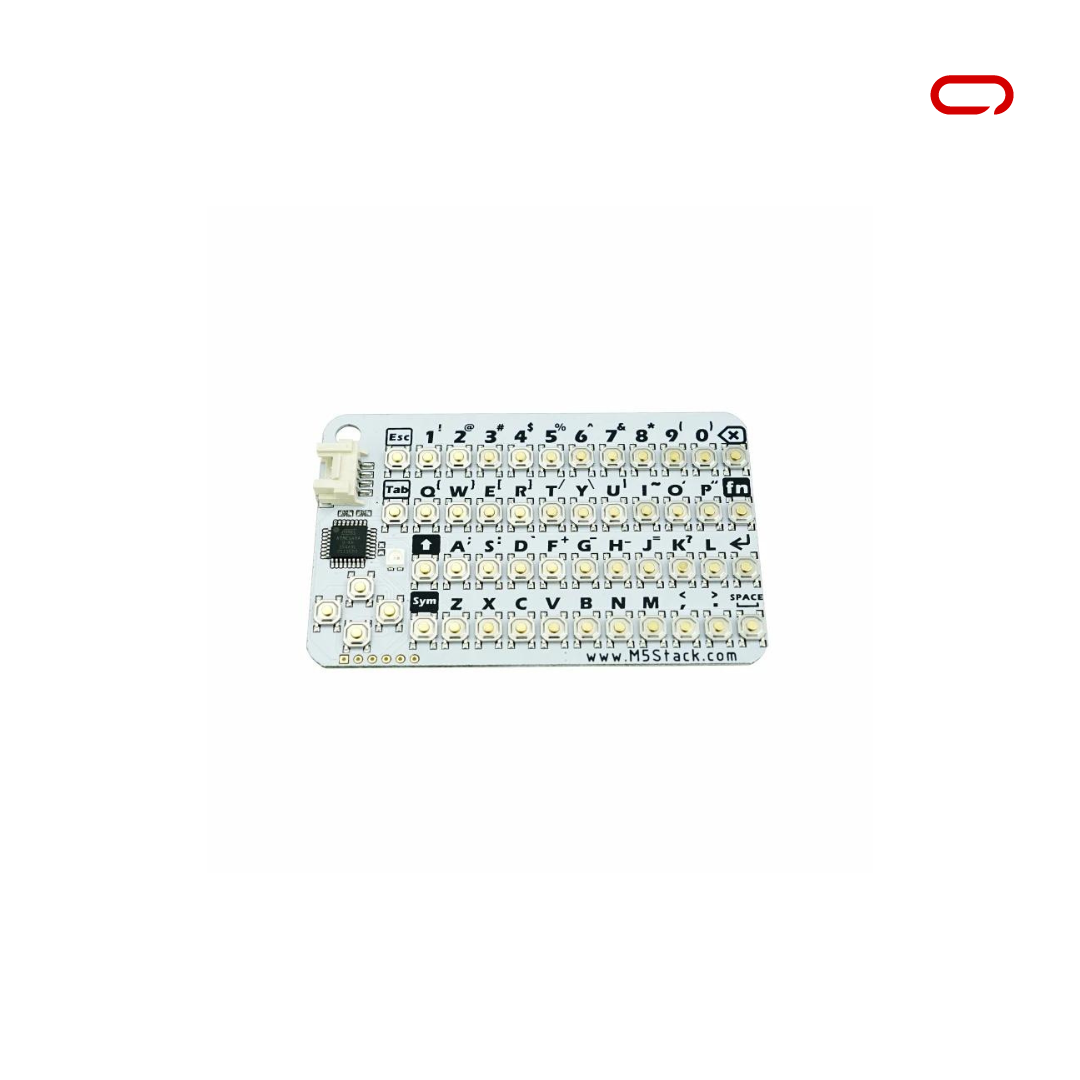
Now that we now have all of the {hardware} able to go, let’s dive into the wiring. To make sure compatibility with all Meshtastic units, we have to perceive the wiring diagram for the CardKB. After connecting the cable (HY2.0-4P) to the connector on CardKB, we are going to reduce off the opposite finish and solder feminine headers to it or you need to use the bare cable to be soldered on to your board. The CardKB comes with a connector that includes 4 cables: Black for Floor, Purple for 3.3 volts, Yellow for SDA, and White for SCL. With this information in hand, we will simply adapt the CardKB to work with any Meshtastic system. We have to find the SDA, SCL, 3.3 volts, and Floor pins on our board. As soon as we have recognized these pins, we will join them to the corresponding cables from the CardKB connector. This ensures that the communication and energy between the CardKB and our Meshtastic system are correctly established.
M5Stack CardKB – Heltec V3 Lora ESP32 Meshtastic Node
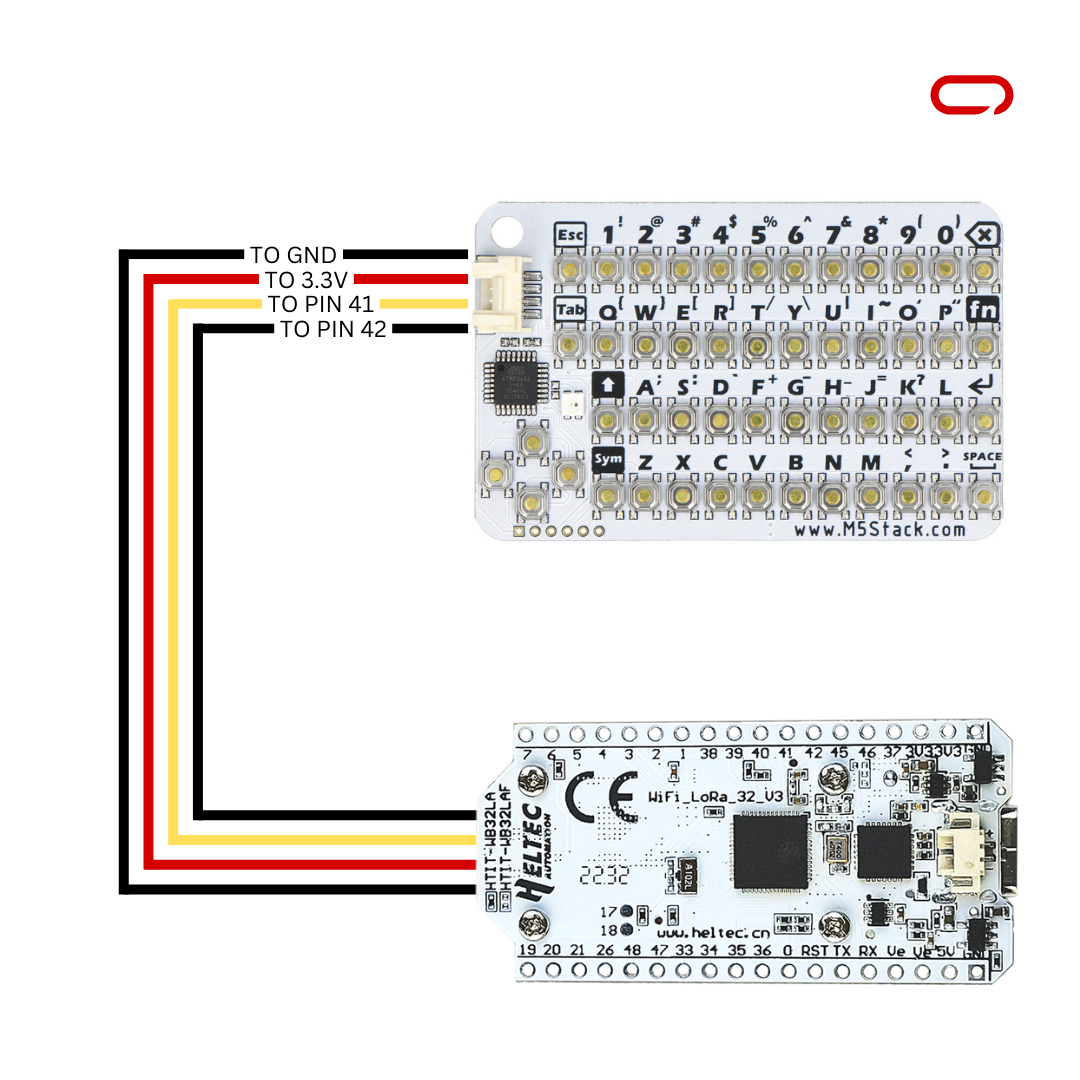
- Black -> GND
- Purple -> 3.3V
- Yellow -> Pin 41
- White -> Pin 42
M5Stack CardKB – Lilygo T-Beam Meshtastic Node
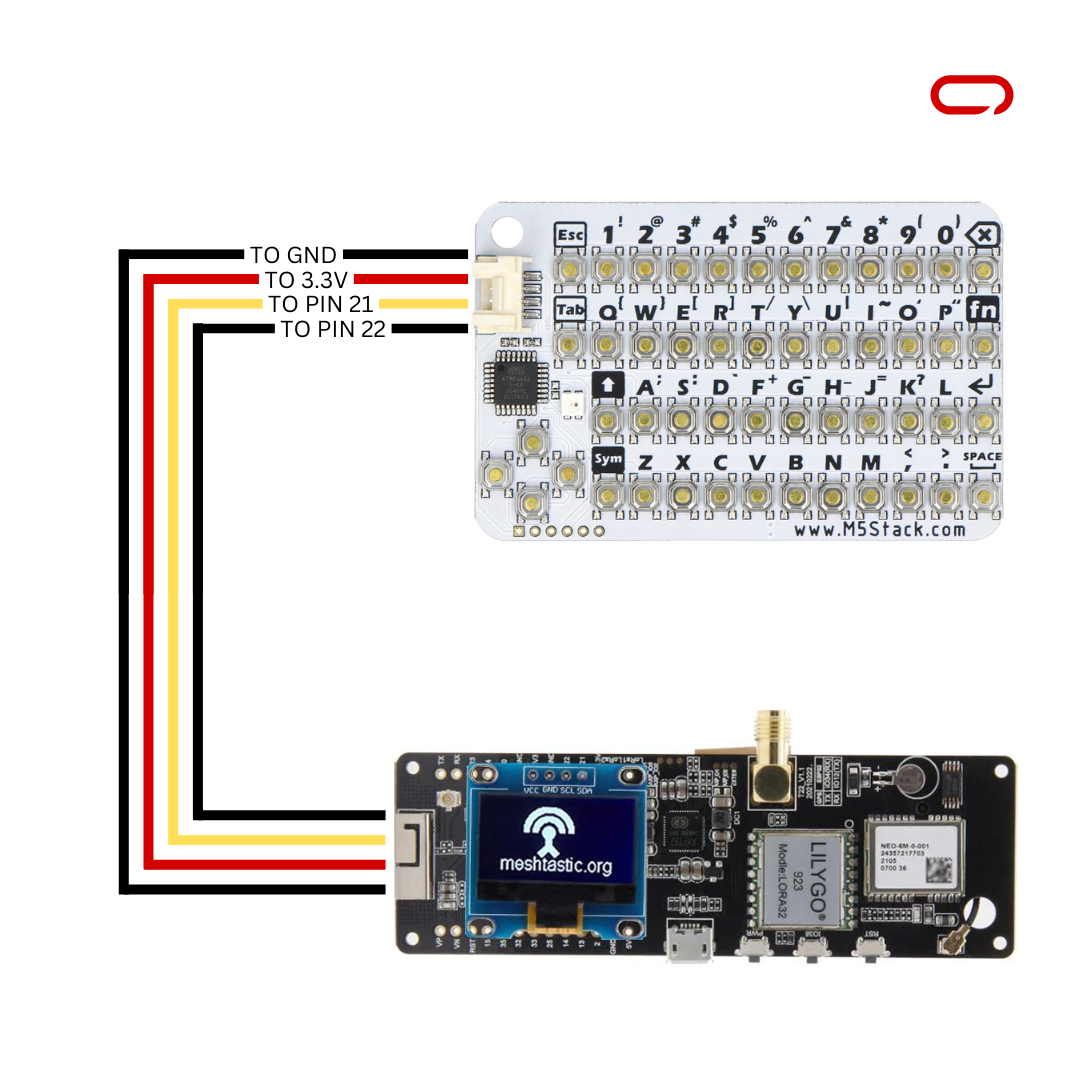
- Black -> GND
- Purple -> 3.3V
- Yellow -> Pin 21
- White -> Pin 22
M5Stack CardKB – Lilygo TTGO Meshtastic Node
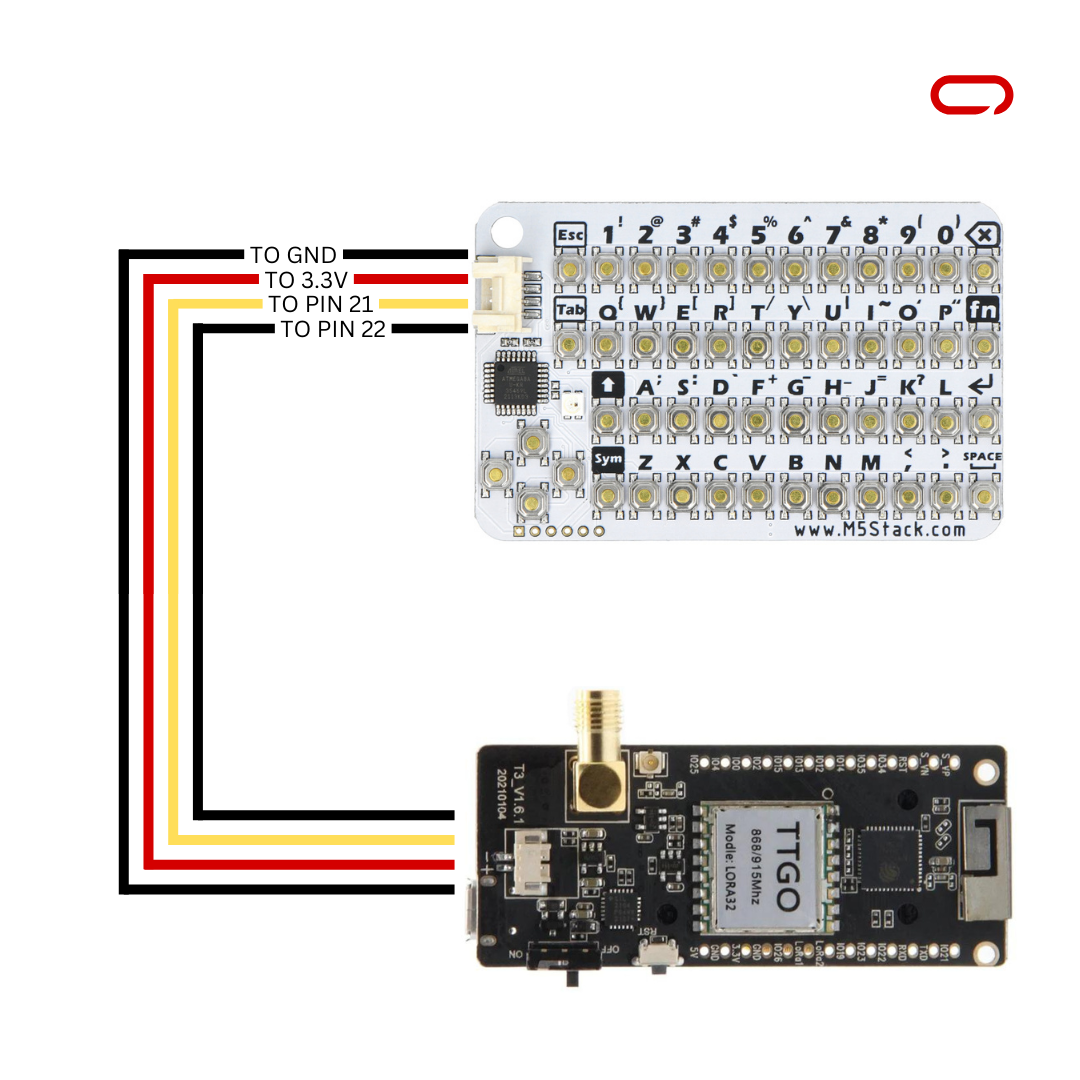
- Black -> GND
- Purple -> 3.3V
- Yellow -> Pin 21
- White -> Pin 22
M5Stack CardKB – DIY ESP32 Meshtastic Node
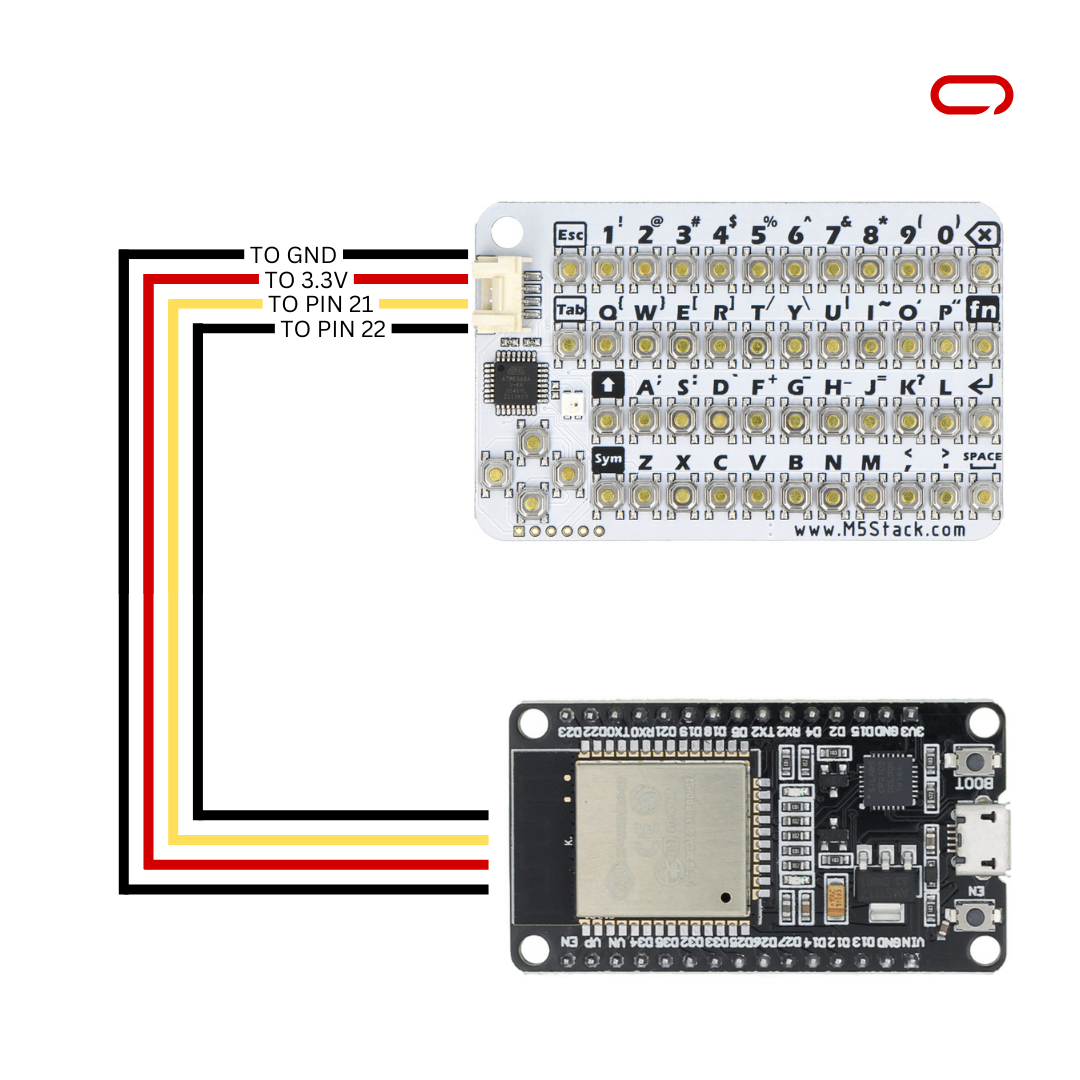
- Black -> GND
- Purple -> 3.3V
- Yellow -> Pin 21
- White -> Pin 22
💡
Should you’re utilizing a unique ESP32-based board, merely discover SCL (White) and SDA (Yellow) in your board. Then, observe the information utilizing the chosen pin, disregarding the particular pin quantity talked about within the directions
💡
Capacitors are good follow for decoupling one a part of a circuit from one other
As soon as all of the wiring is accomplished. Double-check your connections and guarantee they match the steered structure earlier than continuing to the subsequent steps.
Meshtastic Settings
On the Sensor System
- Open Meshtastic App (IOS for this information)
- Go to the Settings web page
- Within the Module Configurations part navigate to Canned Messages
- Allow Canned messages.
- On Configuration Preests droplist select M5 Stack Card KB
- Lastly, press Save
💡
While you energy up your node for the primary time, you would possibly see a message saying „Canned Message Module Disabled.“ Don’t be concerned, that is regular. Merely press the reset button, and your node ought to boot up correctly. After that, it is best to be capable to begin typing with none points.
As soon as you’ve got accomplished the setup, you are all set to dive into the comfort of typing and sending messages immediately out of your node. No extra counting on exterior units or smartphones; with the addition of the M5Stack CardKB Keyboard, your node turns into a standalone communication system.
In conclusion, by including the M5Stack CardKB Keyboard to your Meshtastic Node, you’ve got unlocked a brand new degree of independence and comfort in your mesh communication system. With only a few easy steps, you’ve got reworked your node into a totally standalone system able to sending messages and controlling capabilities immediately, with out the necessity for a telephone or different exterior units.


