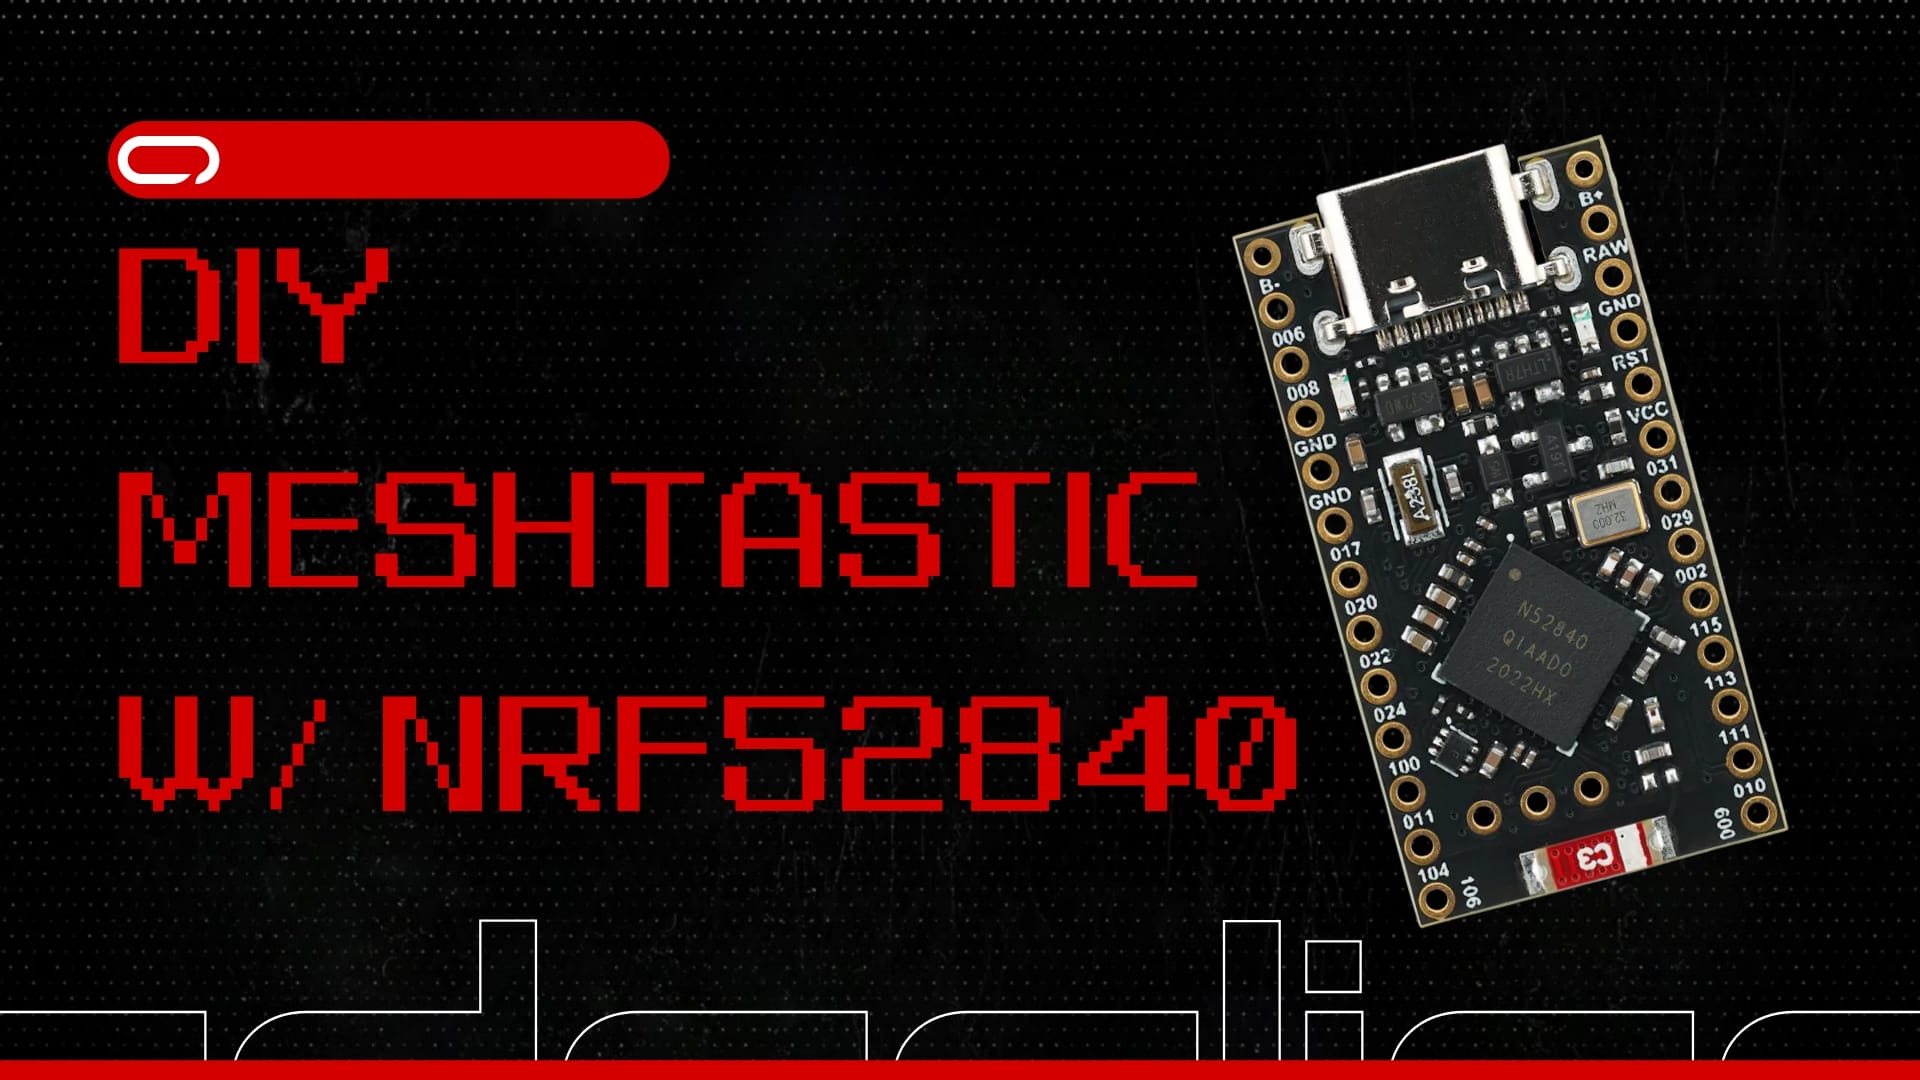
On this information, we’ll present you construct your personal Meshtastic LoRa Node. Whilst you may purchase a WisBlock RAK node for simply $24, you possibly can create your personal for about $12 utilizing a $6 NRF52840 Professional Micro and a $6 LoRa chip.
{Hardware}
Now let’s get began with the {hardware} you want:
NRF52840 Professional Micro

For this information, we are going to use the NRF52840 Professional Micro, a wonderful selection for constructing a Meshtastic LoRa Node. This compact board options an built-in Battery Administration System (BMS) and Bluetooth connectivity, all whereas sustaining very low energy consumption, permitting it to run on a small battery for days. Nonetheless, it is vital to notice that the NRF52840 doesn’t have WiFi capabilities, so options just like the PAX counter or connecting to MQTT by way of WiFi will not be out there. This board is finest suited to functions that depend on Bluetooth and LoRa communication reasonably than WiFi connectivity.
🛑
It’s not really helpful to make use of a battery bigger than 450mAh with this board. Though this limitation is not formally documented, some customers on Reddit have reported points with bigger batteries. We’ve got not examined this ourselves.
LoRa Module Ra-02 DIP

Relating to the LoRa chip, many choices are offered as Floor Mount Elements (SMCs), that are very small and may be difficult to deal with with out damaging the board. Because of this, we opted for the RA-02 DIP model. This model is mounted on an adapter board, giving you quick access to all of the pins and making it so simple as constructing with Lego blocks. Remember the fact that you may have to solder the headers to the board.
To maintain prices low, think about checking along with your native electronics store—they could supply soldering companies, saving you the trouble and expense of buying soldering tools.
If you wish to use a distinct frequency, you might not discover a DIP model (with pins) available. In that case, you may want an adapter board just like the one proven within the image under. We tried to discover a dependable supply for these boards however could not discover one on-line, so verify your native space for potential sellers.
💡
The firmware we are going to use on this information is designed to assist each SX126X and SX127X LoRa chips. Nonetheless, we’ve solely examined it with the SX127X, which is the precise chip talked about on this information.

GIZONT 433 Mhz 10 dbi Achieve
The RA-02 LoRa module often comes with an antenna, however it’s usually of very poor high quality, offering a spread of solely 10-50 meters. We examined the GIZONT antenna (hyperlink offered), and it carried out considerably higher. Whereas it’s attainable we simply obtained fortunate with a well-calibrated antenna, suggestions from Meshtastic customers means that GIZONT is a good retailer.
When selecting an antenna, ensure that to pick the right frequency. In our exams, we used a 40 cm antenna for base stations, like these positioned at house or on a balcony, and a 24 cm or 20 cm antenna for handheld gadgets.
3.7V 110mAh 301230 Lithium Polymer Li-Po
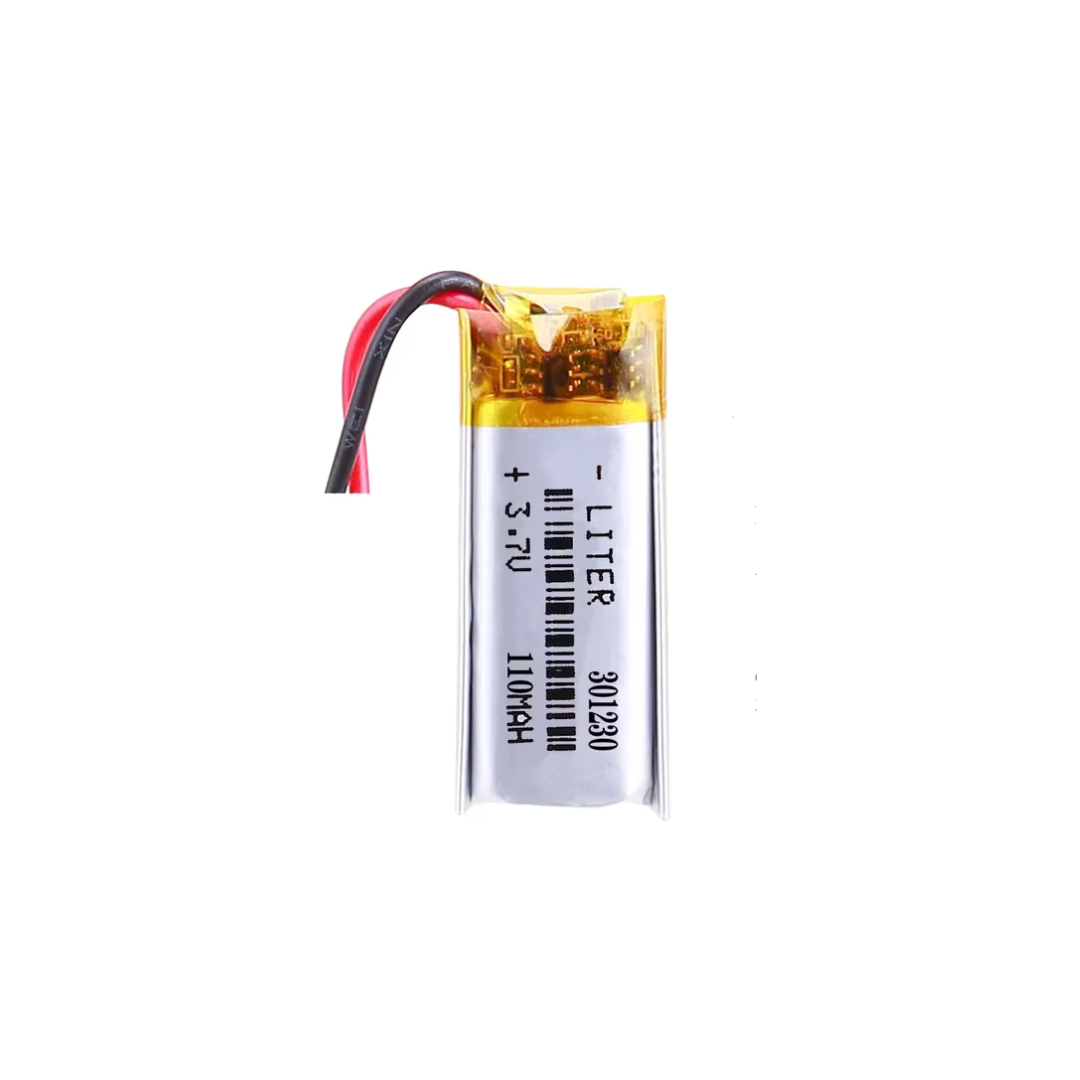
The three.7V 110mAh 301230 Lithium Polymer Li-Po battery is a wonderful selection for powering compact initiatives just like the NRF52840 Professional Micro, due to its small dimension and light-weight design. With the NRF52840’s low energy consumption and built-in Battery Administration System (BMS), this battery can maintain your Meshtastic LoRa node working for a number of days, and the BMS can even recharge the battery when related to an influence supply. This setup is right for transportable or distant functions. Nonetheless, it’s vital to keep away from utilizing batteries bigger than 450mAh with this board, as some customers have reported points with bigger batteries, despite the fact that this limitation is just not formally documented. In our exams, the 110mAh battery offered a very good stability of dimension and energy, appropriate for handheld gadgets or nodes that do not require prolonged uptime.
To attach the battery, merely connect the pink wire to the B+ pin and the black wire to the B- pin on the NRF52840 Professional Micro board. This simple connection permits the BMS to handle charging and discharging effectively, guaranteeing protected and steady operation of your gadget.
🌳
To assist scale back digital waste and save the atmosphere, think about reusing batteries from disposable merchandise like vape pens or different small digital gadgets. These batteries can usually be repurposed for DIY initiatives, resembling powering your Meshtastic LoRa Node. Simply ensure that to check their capability and voltage to make sure they’re protected and appropriate in your undertaking.
Meeting
The {hardware} is all prepared and set now to the wiring. For this, we are going to observe the next Schematics
433 MHZ LoRa Module Ra-02 DIP
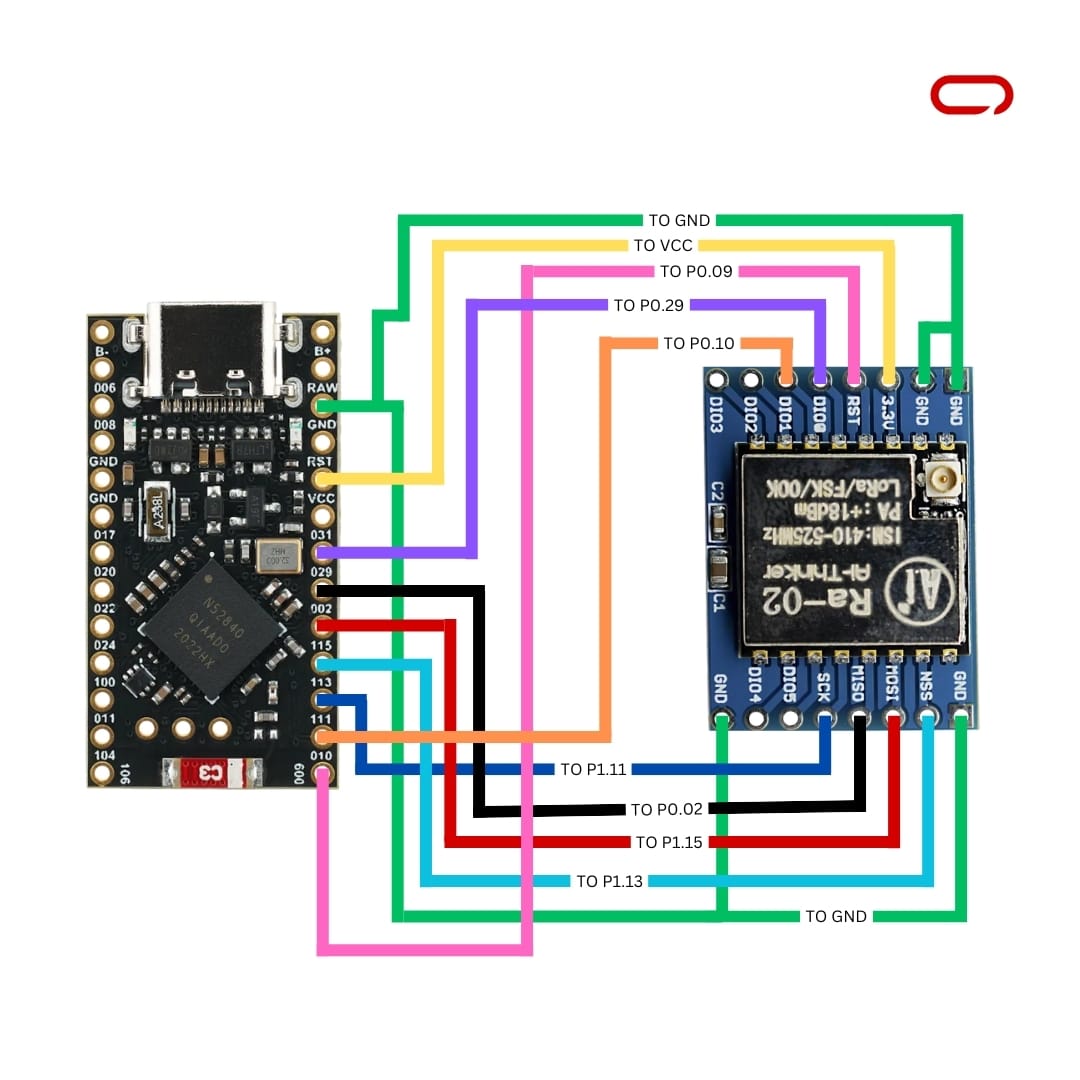
LoRa Module Pin: MISO -> nRF52 Pin: P0.02
LoRa Module Pin: MOSI -> nRF52 Pin: P1.15
LoRa Module Pin: SCK -> nRF52 Pin: P1.11
LoRa Module Pin: NSS -> nRF52 Pin: P1.13
LoRa Module Pin: DIO0 -> nRF52 Pin: P0.29
LoRa Module Pin: DIO1 -> nRF52 Pin: P0.10
LoRa Module Pin: RESET -> nRF52 Pin: P0.09
LoRa Module Pin: 3v3-> nRF52 Pin: VCC
LoRa Module Pin: GND -> nRF52 Pin: GND
0.96-inch I2C OLED
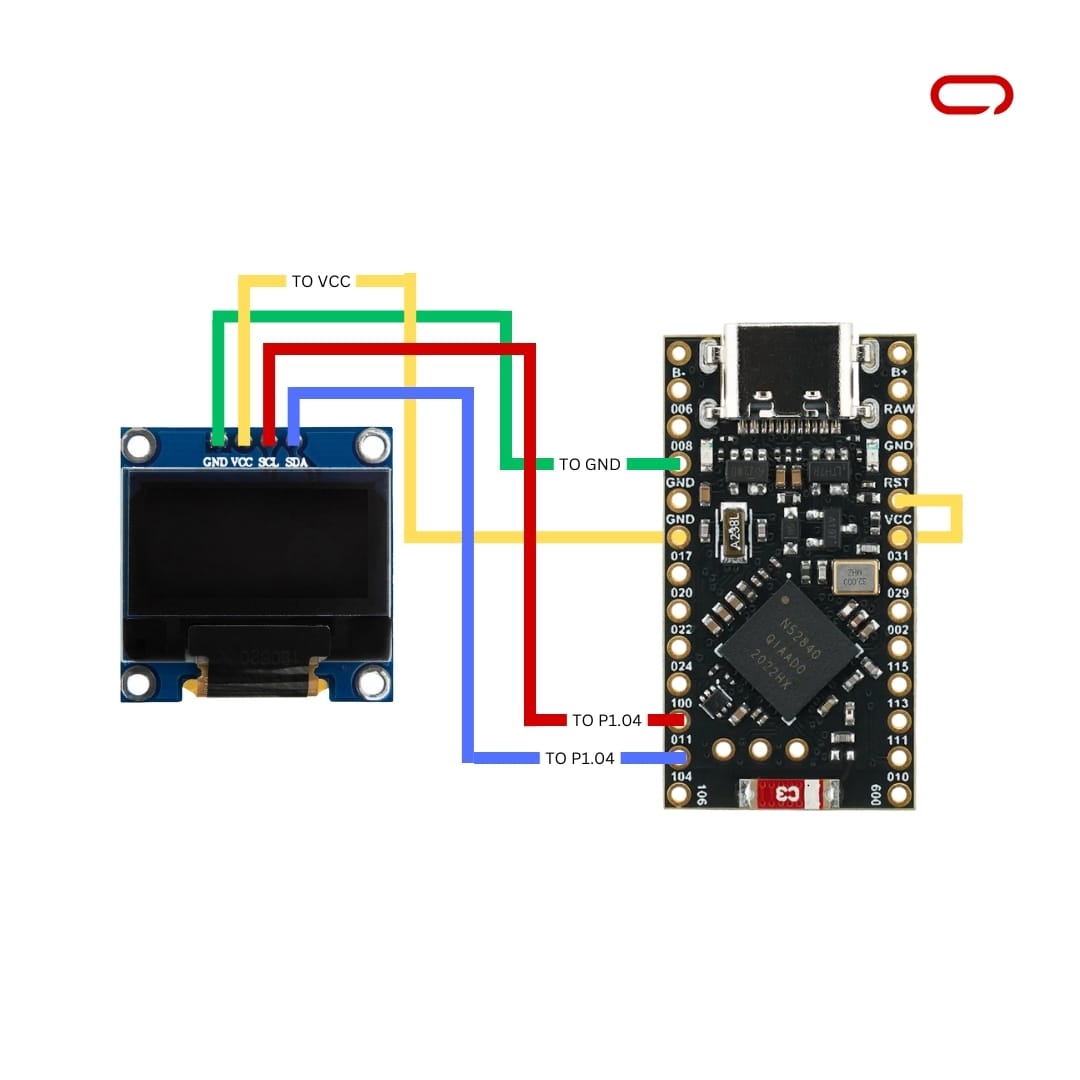
Oled Module Pin: SCL -> nRF52 Pin: P0.11
Oled Module Pin: SDA -> nRF52 Pin: P1.04
Oled Module Pin: 3v3-> nRF52 Pin: VCC
Oled Module Pin: GND -> nRF52 Pin: GND
⚠️
After Finishing The Wiring, It is Essential Not To Overlook The Last Step – Join Your Antenna
💡
Capacitors are good follow however you possibly can skip it
💡
To ascertain the bottom connection, join the 4 floor pins on the Lora board. Strip the wires from the opposite facet, then use one other feminine cable to attach a wire to the bottom on the nrf52840 and strip the opposite facet. Lastly, tie the 4 wires from the Lora board to the wire from the nrf52840 floor, guaranteeing a safe and dependable floor connection. Ensure to make use of electrical tape to keep away from circuit quick
💡
It is vital to notice that the order of the connections would possibly differ. Observe the labels and io ports in your particular elements and the offered schematics to make sure correct wiring. Listening to these particulars ensures that you just set up the right connections and keep away from potential points or damaging your elements
Flashing The Software program
Earlier than flashing your node with firmware, you first have to replace the bootloader, as most of those NRF52840 Professional Micro boards include an outdated model. Though the method is easy, it would take a while.
To replace the bootloader and even flash the firmware, you may have to put the node into DFU (Gadget Firmware Replace) mode. Begin by connecting the node to your PC utilizing a knowledge cable. Then, quick the GND and Reset pins a couple of times, relying in your board. A brand new drive ought to seem in your pc.
First, verify the INFO_UF2.TXT file on this drive to find out your present bootloader model. Make a remark of this model, then go to Adafruit’s GitHub page for the nRF52 Bootloader releases. Discover the following launch that comes after your present bootloader model, however bear in mind, you can not skip variations—you should replace incrementally.
For instance, in case your bootloader model is 0.6.0, it’s best to replace to 0.6.1 subsequent. Within the launch belongings, discover the recordsdata comparable to your board. For the NRF52840 Professional Micro, search for nice_nano_bootloader-X.X.X.HEX and nice_nano_bootloader-X.X.X.UF2. Generally these recordsdata are zipped, so you might have to extract them. Use Ctrl + F to shortly discover „nice_nano_bootloader“ and obtain all the pieces related.
After you have the .HEX and .UF2 recordsdata, put your node in DFU mode if it isn’t, then drag and drop the .HEX file onto the drive. After it transfers, do the identical with the .UF2 file. The gadget will disconnect and restart as soon as the .UF2 file is transferred. Examine the bootloader model within the INFO_UF2.TXT file to make sure it has been up to date to the following model. Repeat this course of till your node’s bootloader is totally up to date to the most recent model.
After updating the bootloader, obtain the {custom} UF2 file offered within the hyperlink right here. Put your node again into DFU mode, then drop the file onto the drive in your node. The gadget will restart, which can take a minute or two, and then you definitely’ll be prepared to begin pairing.
💡
The firmware we are going to use on this information is designed to assist each SX126X and SX127X LoRa chips. Nonetheless, we’ve solely examined it with the SX127X, which is the precise chip talked about on this information.
💡
This firmware is custom-made and isn’t formally offered by Meshtastic. Though it contains the most recent updates, it is not going to obtain any additional updates from us, and the OTA (Over-The-Air) replace function is just not out there. Use it at your personal danger, as we’ve not totally examined all options and can’t take accountability for any everlasting {hardware} harm. In our exams on two gadgets with roughly 85mAh batteries, the firmware efficiently despatched and obtained messages, and charging performance was working. Nonetheless, the voltage reporting could require some bug fixes.
Pairing Units
With the {hardware} assembled and the firmware flashed you are now able to energy up the Meshtastic LoRa Node and pair it along with your cellphone. This step marks the thrilling second when your custom-built gadget begins its communication journey.
- Obtain the Meshtastic app in your cellphone. The app is out there for obtain on each the App Store (iOS) and Google Play (Android).
- Head over to the Bluetooth web page and wait a bit of bit, it’s best to see a tool popping up there.
- Select the Meshtastic gadget you wish to pair with from the record. The gadget’s Node ID and different related data ought to be seen within the app.
- When prompted to enter a pairing PIN, sort „123456“ in your cellphone and wait a second for the connection to determine. Subsequent, you may be requested to pick your area—select „EU433.“ The node will restart, and also you’ll be all set to go.
Your new Meshtastic LoRa Node is now able to serve in a wide range of functions, whether or not it is for distant communication, out of doors adventures, or as half of a bigger community of gadgets. With this construct, you have tapped into the facility of open-source initiatives and the DIY spirit, becoming a member of a group of lovers devoted to modern and decentralized communication options.
As you discover the capabilities of your Meshtastic LoRa Node, keep in mind that there’s all the time extra to study and enhance. Contemplate experimenting with totally different antennas, battery sizes, and configurations to additional optimize efficiency. And as all the time, share your experiences and insights with the group to assist others on their very own DIY journeys.
Benefit from the freedom and suppleness that comes along with your new custom-built Meshtastic LoRa Node. Completely satisfied constructing and keep related!


